0020. The first step to manipulate trueSpace using ptsxpy
Posted: 2021-Apr-19 2:13
First of all, make a text file, rename it to "cube1.py", copy&paste the code below to it. (You can also keep the file extension to ".txt". Changing to ".py" allows to give your text editor a hint to know how to syntax-highlight)
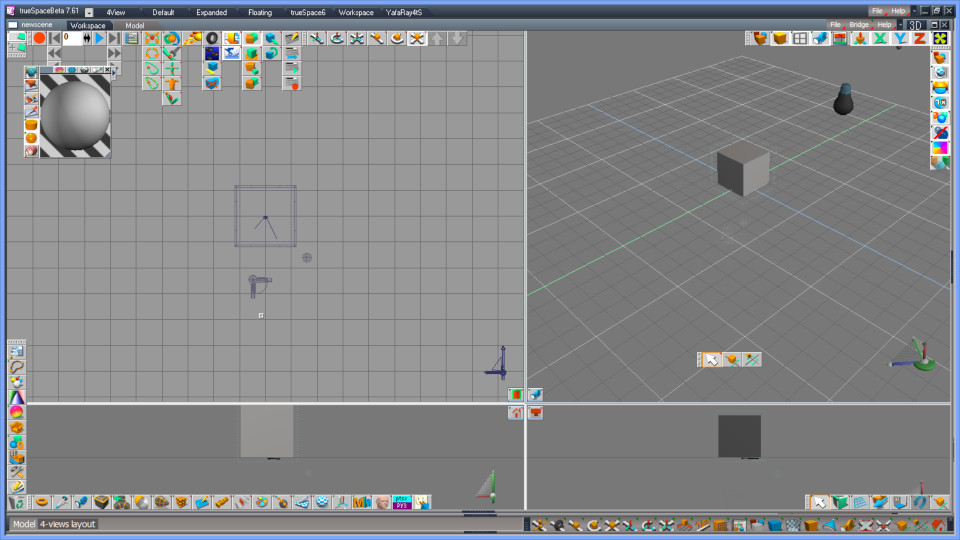
Start your trueSpace (tS), clear the scene ("Create New Scene" button), and run the script file. (Please read "Installation and simple test" to understand how to execute your python script file using ptsxpy.) A cube is displayed to the origin of the scene.
In the first line, the script declares to use a module "ptsxpy" and applies an alias "p" to it.
When we call each method (function) in a Python module, we write as;
moduleoralias.method( parameter1, parameter2, ...)
In this case, we use ptsxpy or p for moduleoralias.
The ptsxpy module has functions corresponding to almost all tsxAPI functions described in the tsxAPIxx.doc (and several functions defined in C++ header files) in the SDK (Software Development Kit) for each tS version.
You should be able to get the official SDK that includes "tsxAPI.doc" via the net though it has not been supported by the vender(s). Please note that we should refer not "TSXPYTHON.DOC" (titled "Caligari tsxPython Interface") but tsxAPIxx.doc (where xx is code for each tS version, and titled "Caligari trueSpace eXtension") in order to develop your python scripts for ptsxpy.
In order to add and display a cube to a scene, we use functions below;
For example, tsxCreateCube()'s C++ syntax defined in tsxAPIxx.doc is;
In this code example, we assign (i.e. copy) the returned value to a variable "cb1". Of course, you can freely name it (according to the naming rule of Python language). We can use the variable in the following lines. In other words, we must assigned the returned value to a variable in order to use the created object.
Please note and keep in mind that the byte length of a pointer is 4 (i.e. 32 bit) and equivalent to unsigned long type without any exception for all tS versions. In other words, the tsxCreateCube() returns an integer value 0 thru [latexin]2^{32}[/latexin]-1 (0x00000000 thru 0xffffffff in hexadecimal). It's the same in case of ptsxpy; CreateCube() returns an integer value and cb1 is to have the value. If you would like to know the value, add print() like;
or
The formatting to hexadecimal in the latter case is similar to printf() in C/C++ language. Please note that the connector is not a comma "," but percent "%" for Python language.
Now let's take a look at the parameters of CreateCube(). The first parameter nbrSections is defined as "resolution" in the tsxAPIXX.doc. Specifying 1 to it means the cube to be created does not have any latitude and longitude other than its minimally required twelve edges (You can see what is latitude and longitude if you change it to 2 or 3). The second, third, and fourth parameters determines each dimension (size) of x, y, z. Please try to change and look how the result changes. Note that each of x, y, z must be a floating point value (you can omit the 0 of 1.0).
The remaining two lines are needed to realize (visualize) the cube object in your tS's view. The line of SceneAddObject() adds the created cube to the scene. Its C++ syntax defined in tsxAPIxx.doc is;
We can use e_tsxFALSE without any explicit importing like the 2nd parameter of SceneAddObject() above. Most constants defined in tsxAPIxx.doc and C++ header files are defined in ptsxpydef1.py. The ptsxpy always imports ptsxpydef1.py. If anything defined in ptsxpydef1.py interferes/disturbs your script, you may change/replace ptsxpydef1.py. It's a plain text file.
Until this SceneAddObject() is called, the cube stays invisible (though some manipulation actions like move or scale can be done before visualize it). The SceneDraw() refreshes the view. Even in case you omit it, you can refresh the view by hand using View Control, etc.
Please note that calling SceneAddObject() is needed for each object and calling SceneDraw() once at the end of the script is enough.
Code: Select all
import ptsxpy as p

cb1 = p.CreateCube( 1, 2., 2., 2. )
p.SceneAddObject( cb1, e_tsxFALSE )
p.SceneDraw()
In the first line, the script declares to use a module "ptsxpy" and applies an alias "p" to it.
Code: Select all
import ptsxpy as p
moduleoralias.method( parameter1, parameter2, ...)
In this case, we use ptsxpy or p for moduleoralias.
Code: Select all
cb1 = p.CreateCube( 1, 2., 2., 2. )
p.SceneAddObject( cb1, e_tsxFALSE )
p.SceneDraw()
You should be able to get the official SDK that includes "tsxAPI.doc" via the net though it has not been supported by the vender(s). Please note that we should refer not "TSXPYTHON.DOC" (titled "Caligari tsxPython Interface") but tsxAPIxx.doc (where xx is code for each tS version, and titled "Caligari trueSpace eXtension") in order to develop your python scripts for ptsxpy.
In order to add and display a cube to a scene, we use functions below;
- CreateCube() .... corresponds to tsxCreateCube() in tsxAPI
- SceneAddObject() .... corresponds to tsxSceneAddObject() in tsxAPI
- SceneDraw() .... corresponds to tsxSceneDraw() in tsxAPI
Code: Select all
cb1 = p.CreateCube( 1, 2., 2., 2. )
- tsxPOLYHEDRON* tsxCreateCube(int nbrSections,float x,float y,float z)
In this code example, we assign (i.e. copy) the returned value to a variable "cb1". Of course, you can freely name it (according to the naming rule of Python language). We can use the variable in the following lines. In other words, we must assigned the returned value to a variable in order to use the created object.
Please note and keep in mind that the byte length of a pointer is 4 (i.e. 32 bit) and equivalent to unsigned long type without any exception for all tS versions. In other words, the tsxCreateCube() returns an integer value 0 thru [latexin]2^{32}[/latexin]-1 (0x00000000 thru 0xffffffff in hexadecimal). It's the same in case of ptsxpy; CreateCube() returns an integer value and cb1 is to have the value. If you would like to know the value, add print() like;
Code: Select all
cb1 = p.CreateCube( 1, 2., 2., 2. )
print( "cb1=", cb1)
Code: Select all
cb1 = p.CreateCube( 1, 2., 2., 2. )
print( "cb1=0x%08x" % cb1)
Now let's take a look at the parameters of CreateCube(). The first parameter nbrSections is defined as "resolution" in the tsxAPIXX.doc. Specifying 1 to it means the cube to be created does not have any latitude and longitude other than its minimally required twelve edges (You can see what is latitude and longitude if you change it to 2 or 3). The second, third, and fourth parameters determines each dimension (size) of x, y, z. Please try to change and look how the result changes. Note that each of x, y, z must be a floating point value (you can omit the 0 of 1.0).
Code: Select all
p.SceneAddObject( cb1, e_tsxFALSE )
p.SceneDraw()
- void tsxSceneAddObject(tsxGNODE* pGNode,tsxBOOL bNoDraw)
- pGNode tsxGNODE*: the object to be added
- bNoDraw tsxBOOL: TRUE if the new object shouldn't be drawn within this function call
- enum tsxBOOL { e_tsxFALSE = 0, e_tsxTRUE };
Code: Select all
e_tsxFALSE = 0
e_tsxTRUE = 1
Until this SceneAddObject() is called, the cube stays invisible (though some manipulation actions like move or scale can be done before visualize it). The SceneDraw() refreshes the view. Even in case you omit it, you can refresh the view by hand using View Control, etc.
Please note that calling SceneAddObject() is needed for each object and calling SceneDraw() once at the end of the script is enough.